Welcome

Thanks for visiting my blog, I hope you enjoy it. I'd also invite you to visit my website at http://www.addietalley.com as well. That should help to answer most questions and you can check out some more of my work. I would love to hear from you whether that be through comments or email!


Showing posts with label how to. Show all posts

Wednesday, May 2, 2012

How To: Write a Thank You Note

So I guess you know by now that I rarely do a tutorial and usually its only if its something that I feel fairly strongly about (like watching a gorgeous wedding cake being buthered)...

And here is where Im about to show my Southern roots... :)

It seems like no one knows how to write a thank you card anymore... its just crazy! And had I attempted what Ive seen some do, both my mother and grandmother would have never ever let me get on with my life... thats how important a good thank you is.


So... there are 3 things that I see alot that should not be happening...
1. No thank you card is ever sent.
2. A generic card is given but it only contains the sender's name.
3. A generic card is given but it only contains the dreaded "thanks for the gift" and the sender's name.

(Im not even going to comment on sending a text or email instead of a handwritten note)


EEEKKKKKK!!!!!!!


If youve done one (or maybe all) of these three, its ok... thats what we are here for... so we dont repeat the same mistake... :)


For just a minute, lets look at what each of these mistakes says to the receiver.
1. No thank you card is ever sent.
- you are an ungrateful person who doesnt appreciate anything (not saying thats true, just the message it sends)


2. A generic card is sent but it only contains the senders name.
- you didnt really like the gift but know its proper etiquette to send something


3. A generic card is sent but it only contains the dreaded "thanks for the gift" and the sender's name.
- probably the worst because it says I acknowledge that you spent your own time and money getting me something that you thought I would enjoy, but I dont even have five minutes to spend actually telling you thank you for it.


As stated before.... just because the message is sent doesnt make it true... maybe you really did appreciate the gift, you just have never been taught how to write a proper thank you note... not your fault really.... but in all essence, you are still sending the same messsage.... so lets change that, shall we?


Ok, so the first question is: WHEN DO I SEND A THANK YOU NOTE?


The easy answer is.... when you didnt open the gift in front of the sender.


The slightly longer answer is... when you didnt open the gift in front of the sender and the intrisic worth of the gift is not more than the cost of sending a thank you note.


For example, if you had a birthday party and opened the presents in front of your guests and therefore thanked each one in person, there is no need to send a thank you note or if your friend sent you a card, then there is no need to send them a reciprocal thank you card (this is the time for the text or email).


Otherwise... you need to send them a handwritten thank you card... NOT A TEXT OR AN EMAIL.


Ok, so if youve made it this far and arent steaming mad at me (I promise Im only trying to help), then you are ready to get down to the nitty gritty of actually writing a thank you note... :)


For all purposes and intent, I like using blank note cards that have something pretty or even "thank you" on the front.... They are cheaper, just as good and force you to actually be personal with the person you are thanking.... actual "thank you" cards make you want to cheat and go to #2 or #3 - DONT.


Also, thank you notes should be sent usually within 1-2 weeks of receiving the gift... with a few exceptions, weddings and babies can take up to a month b/c they are obviously busy (this doesnt include showers given before), deaths/funerals can take up to 6 months.


Alright... so here we go... :)


1. A Greeting
- I know it was common in another era to write "Dear" in front of someone's name, but this has become outdated - unless the person you are writing to comes from that era.... otherwise, just start out with that person's name or family name

Ex: Susan, or Talley family,


2. The First Thanks.
- The first line should be thanking them for exactly what they gave you.... you should never write "thank you for the gift" - this assumes that you dont even remember what they gave you. Always be specific.

Ex: Thank you so much for the red, plush blanket. or Thank you so much for babysitting my kids for a couple of hours.


3. Why You Love It.
- You need to give at least 2, if not 3 reasons why you love the gift - what makes it perfect for you or what you intend to use it for.

Ex: The blanket is so, so soft and I love the color. It matches our pillows perfectly! It will be great for date nights with my husband cuddling on the couch.


4. Bonus: Something Nice about the Sender.
- You get extra points if you add in something nice about the sender right after you tell why you love the gift. (doesnt have to be long or extravagant, just that you appreciate the giver as well as the gift.)

Ex: You always know just what to get me. or You are the best!


5. Thanks again.
- End your note with another thank you for the gift - after all, they spent their own time and money getting something just for you.

Ex: Thank you again for everything. or Thank you again for the blanket - it means so much.


6. Your name.
- End the note with your name, adding a personalized greeting if you want.

Ex: -Addie (I usually add a heart in front of my -Addie)


Example of a good thank you note:
Susan,
Thank you so much for the red, plush blanket. Its so, so soft and I love the color. It goes perfectly with my pillows. And it will be so great for date nights with my husband cuddling up on the couch. You were so thoughtful to think of me. Thank so much for being my friend and for always knowing what to get.
<3 (thats a heart), -Addie


Bonus tip:
- The most important part of this is to be sincere. You need to write like you would speak (grammar and spelling correct though)... dont try to come across as all uppity and hoity-toity like you might think is proper... the whole purpose of the note is to really thank the sender for their generosity.


So there you go.... easy peasy pie.... you did it... and what, it took all of maybe 5 minutes and I guarantee you will have made a huge impression on the reciever of the note.... so now - no excuses to not send a note or go to the standard "thank you for the gift"....

You can do this!!!!

Bonus tip: On your next shopping trip to Dollar Tree, Dollar General, Walmart, etc... stop by the card aisle and pick up a pack of 8 blank notecards (some even have "thank you" on the front) - you can get them for $1-2, and then you will have some on hand.... and when they are on hand, you will use them!


Ok.... really, really hope that was helpful.... Id love to know what you thought or if I didnt explain anything clearly. Feel free to leave a comment or email me at talleyimages@yahoo.com and let me know. (and feel free to pass this along anonomously to those few people you are thinking about - you know you were)... :)

Thursday, December 22, 2011

How To: Cut a Layered Cake - Columbus MS Photographer

I originally posted this here on August 24, 2010.... and its been one of my most popular posts, so I thought I would make it a little easier to find and put it here... just in time for all the holiday goodies and weddings... Id love to know if you used it and how it worked for you. Are there any other tutorials you would like to see here on the blog - leave a comment or email me at talleyimages@yahoo.com - I would love to hear from you!

-----------------------------------------------------------------------
As a wedding photographer, Ive been to my fair share of weddings, and although most are very different, there is one thing that almost all of them have in common. By the time its all said and done, their wedding cake is butchered. Now its not really hard to see why - most people dont have the experience that is needed - there just arent that many large layered cakes that people get the opportunity to cut.

So in honor of that... I thought I would offer a tutorial on how to cut a layered cake.... this can easily apply to a wedding cake, but it also can be used for a child's birthday cake (usually of the first birthday variety).... and yall, this is going to be ghetto, but it is going to be ghetto-FAB-U-LOUS! because I am not a professional baker and this is not a professional food shoot... but hopefully it will be helpful. (oh and go ahead brace yourself for lots of pics)

First things first.... this is definitely a two person job and can get overwhelming fast... brides, please make sure you have at least 2 people at your cake tables (and make sure they read this post, so you dont have a butchered cake!).... things needed: a cake knife, a cake server, plates and forks for the guests to eat the cake, but you will also need a damp cloth of some sort (and something to put it on so it doesnt get the tablecloth wet) - this is important as cake cutting with sticky icing is messy and the more icing there is, the harder it is to cut nicely

Allright.... so here we are.... this is my lovely "wedding cake" that I made... it may not look fantastic-o, but it sure did taste good...
Here it is in all its tungsten-light glory... woo hoo! And on to the table, where this demonstration is actually going to take place. The first thing you want to do is to remove the top layer.... if its for a wedding, the bride and groom will save this to eat a year later... if you arent sure, save it anyway.... if its a birthday cake, this top layer makes a perfect little smash cake.... to remove, take the cake server and slide it under the top layer, use the knife - flat - on top, to move it to a plate....


*It is important, especially with wedding cakes, to be careful of dowel rods in the cake - be aware, and if possible, move the server over to one side and continue.


And we have lift off... :)

Go ahead and plate this top part and move on to the cake.
Looks yummy!
Ok, here is the number one mistakes most cake cutter/servers make.... they start from the bottom and try to work their way up.... NUMBER ONE RULE FOR CUTTING A LAYERED CAKE: ALWAYS, ALWAYS, ALWAYS START AT THE TOP AND WORK YOUR WAY DOWN.... its easy to see why people start at the bottom - this is usually where the bride and groom start cutting - this is only for photos.... its ok if there is a small piece missing on the bottom where the bride and groom cut - but you need to start at the top!.


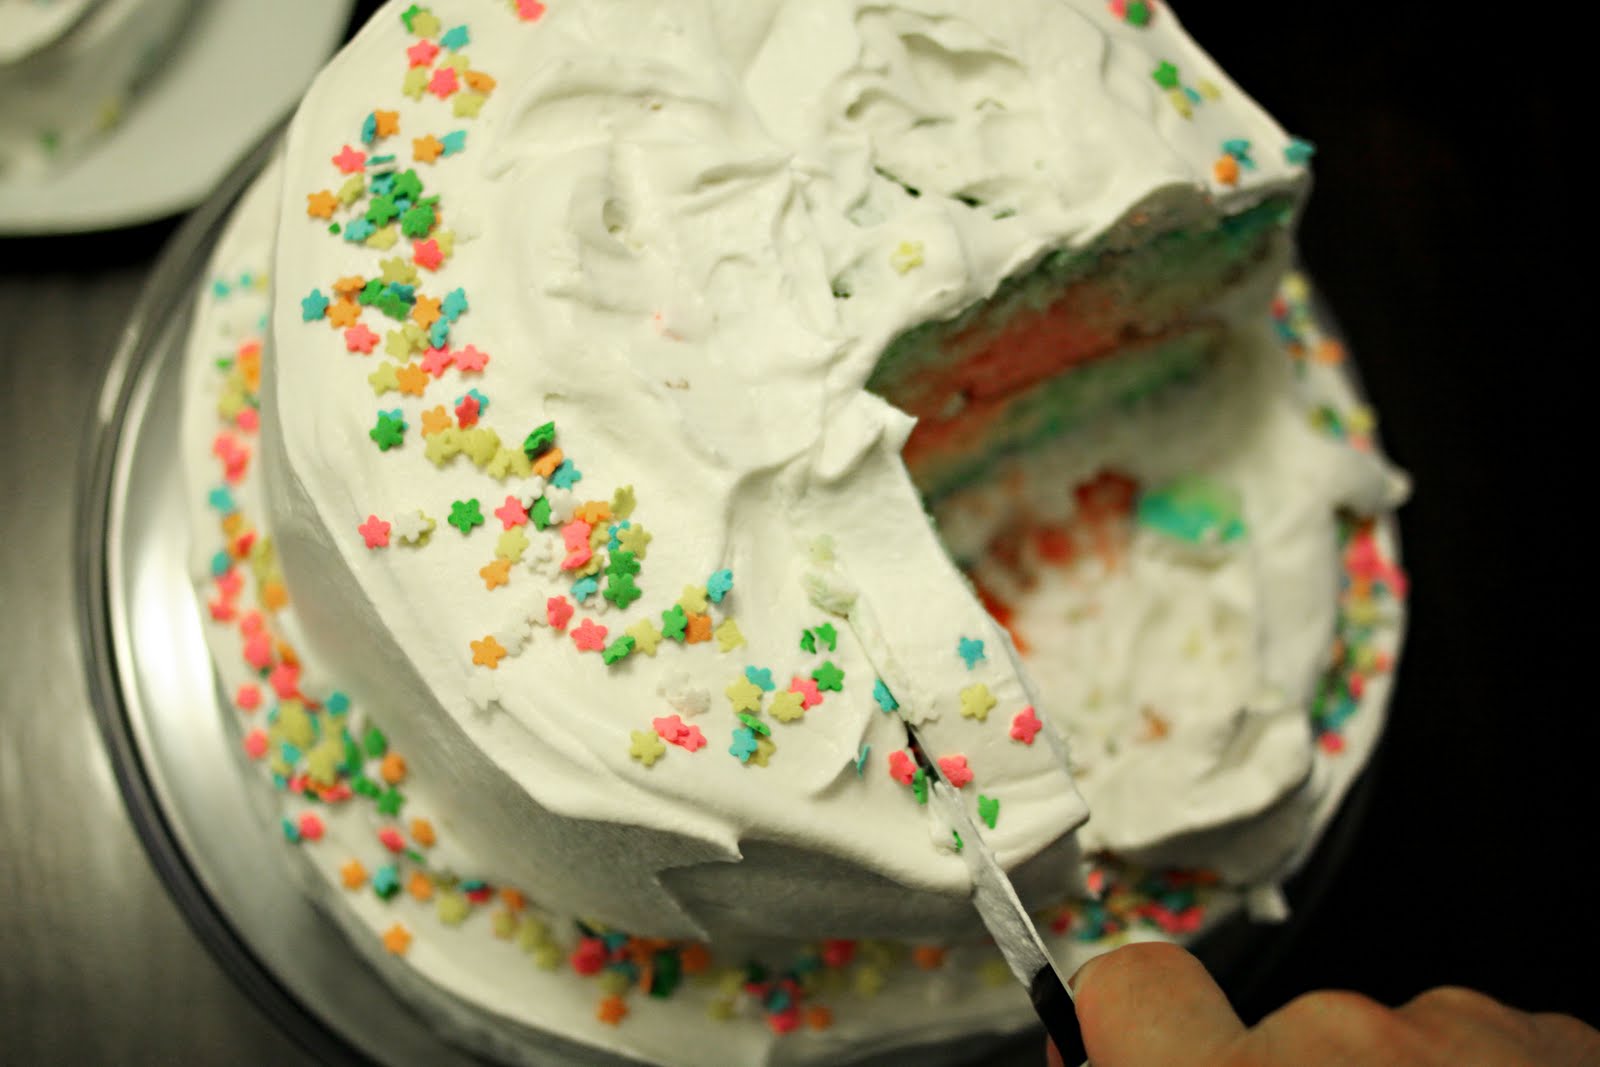
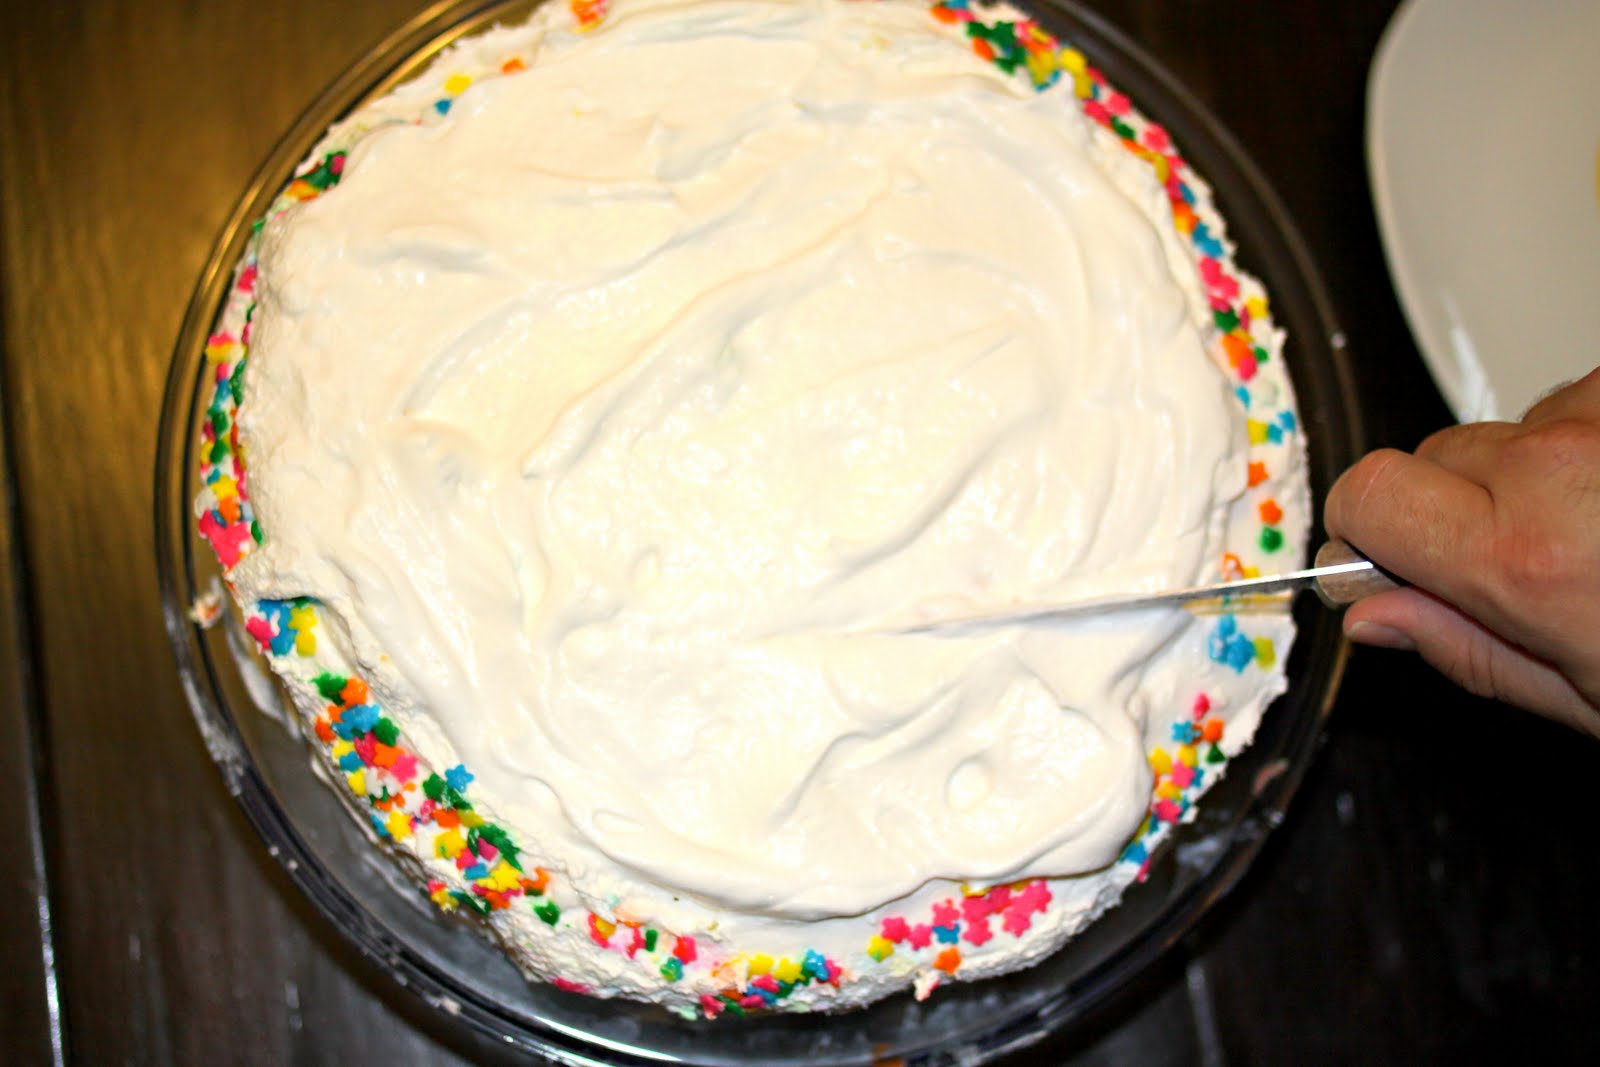
And at the top.... go about 3-4" inches vertically from the bottom of the cake (this layer is an 8" cake so the middle is about 4")... start in the middle and make a horizontal cut all the way across the layer. (note, if the layer is quite larger, then only cut about 5" or less - however big the blade on your knife is - from the side)


Then start back at where you started and cut all the way verticall down... this will leave you with probably a good quarter of the cake...


Now you can start cutting your slices.... the better way is to probably start from the outside and work your way in, but I like starting from the inside and cutting my way out - makes the most uniform pieces of cake.... each piece should be 1/2" - 1" in diameter.... this is where its important to have 2 people... as soon as you pull that first slice out, you need to have someone else there to plate it, and to also make sure that other cut part doesnt fall off the cake - this will be a big mess, and also why if youve never done this before, its probably a better idea to start from the outside and work your way in.


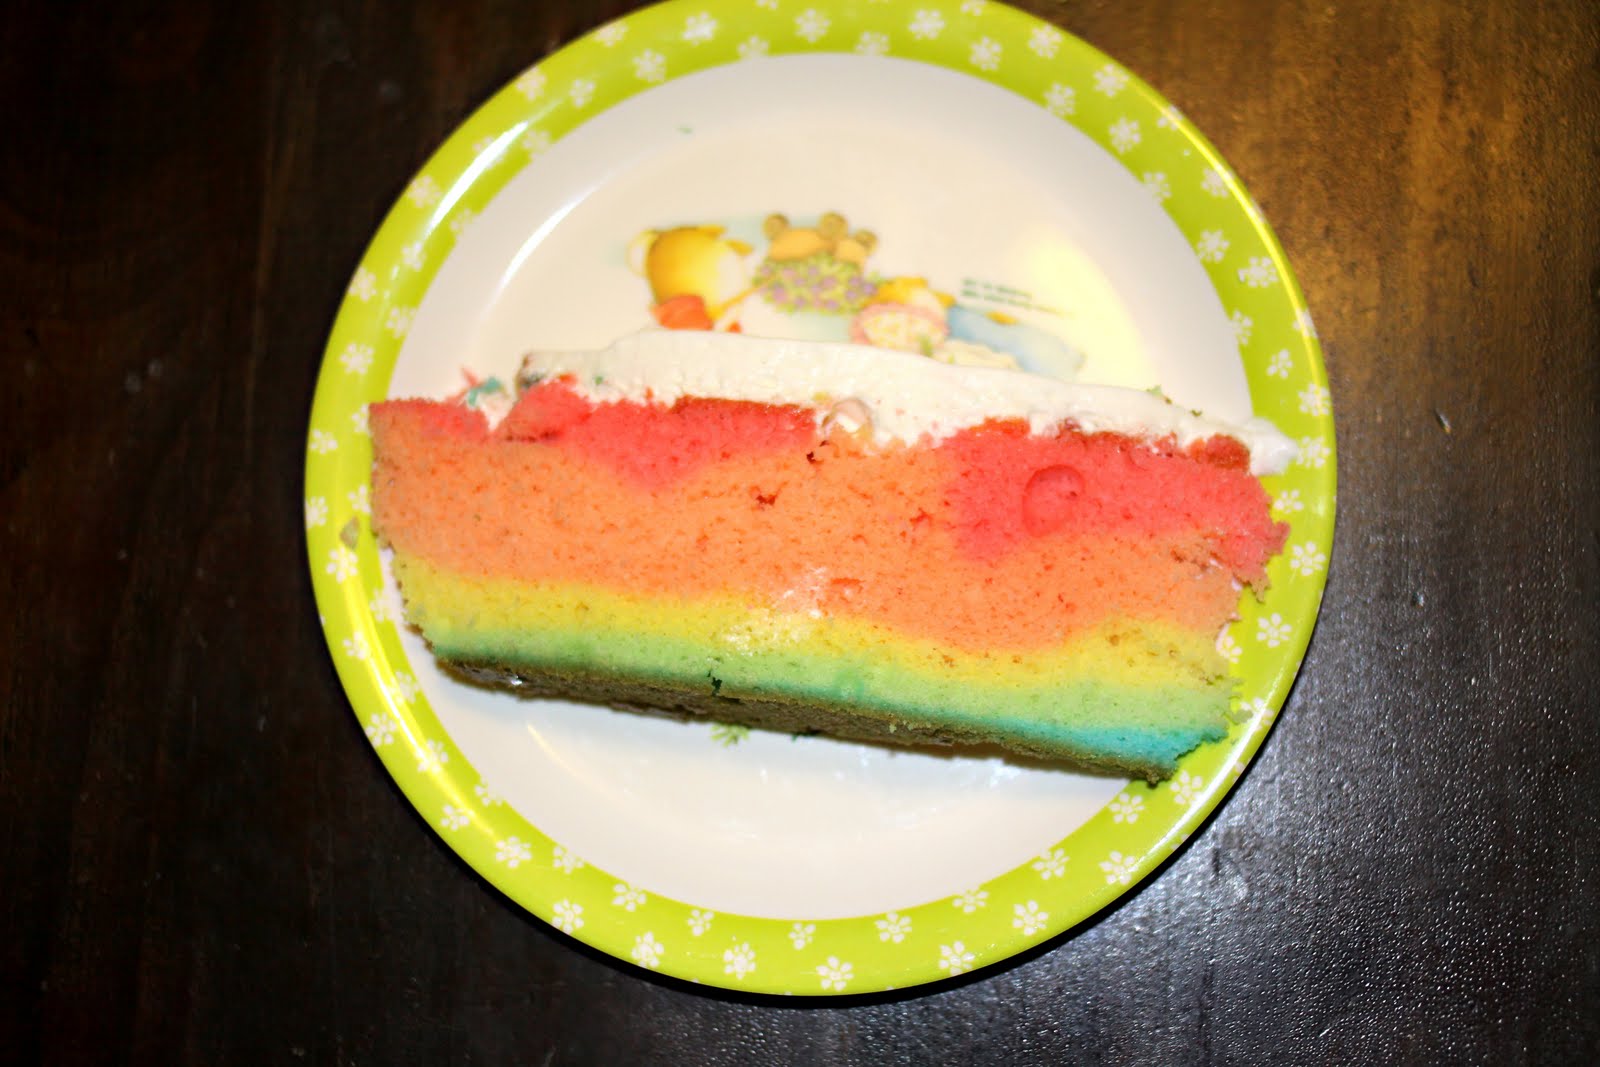
Look how pretty this rainbow cake is!
Its like a little piece of art!


Alright, for the rest of this side, you can cut slice by slice....


What the cake looks like so far....


It did turn out really pretty the whole way through...


For the remainder of that first layer, continue like you did before... cutting slice by slice... and dont forget to watch out for those dowel rods... .


And now we arrive at the next layer...
This is a 10" layer, so we start like we did for the first layer.... go about 3" up from the bottom, start in the middle and cut horizontally across


Then make your cut vertically to the corner of your other cut... not 1/4 of the cake this time, but still a good chunk.

Then cut your slices about 1/2" - 1"... as I said before, I like to start in the middle, but if you are new at this, you probably want to start from the outside... again, make sure you have someone there to plate these slices and also to keep the cake from falling off


Continue slicing...


And plating...


I love how even this bottom layer turned out... just like a real rainbow...


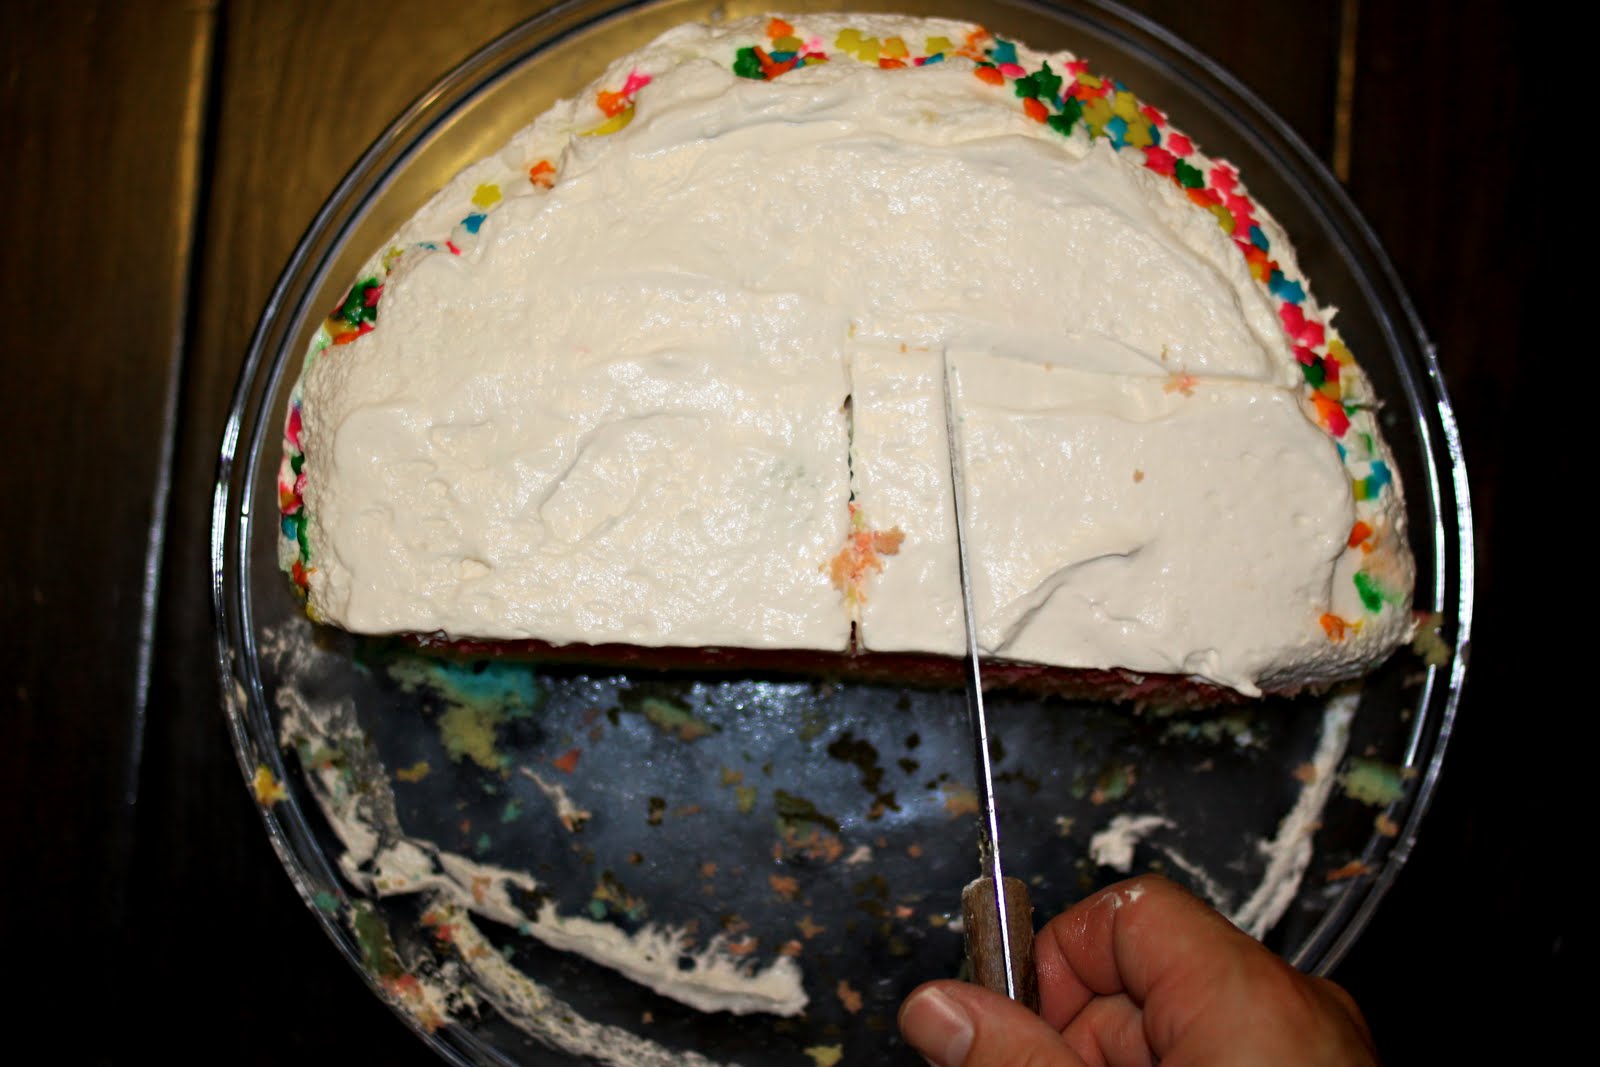
Ok, once we have sliced our bottom row, we will move up.... this time I like to do the vertical cut first, so I can gage how far up to cut (want to stop about halfway from the top)


As before, do your horizontal cut all the way to the edge


Then slice.... again, make sure you have someone to plate and to balance the cake (its a little easier when its the bottom layer)


We plated from the outside this time.... :)


And here is what the cake actually looks like at this point.
Go ahead and finish off that row...


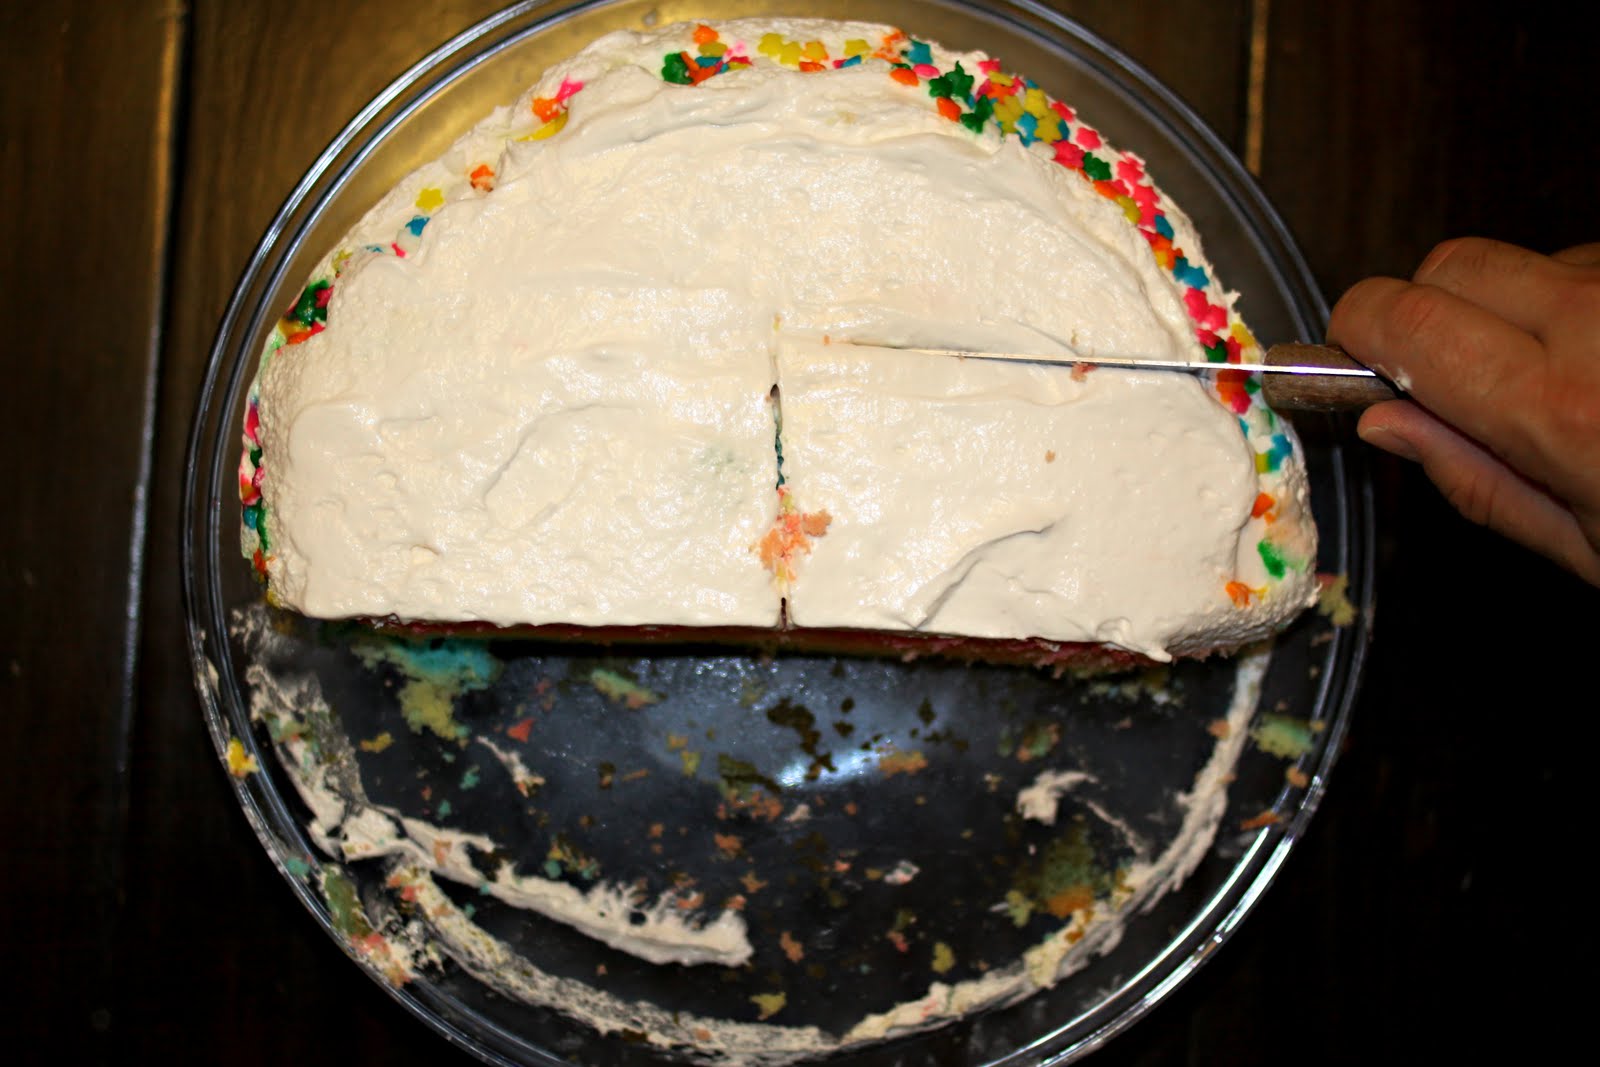
On to the last row.... go ahead and make your vertical cut in the middle And then slice as before.


And there you have it.... :) (click on pics to view larger).


A quick tip for brides: Order the cake for half as many people as you invited. So if you invited 100 people, only order cake for 50 people. Not everyone is going to show up and not everyone is going to eat cake.... this will save you money and from having a whole layer of cake at the end of the reception..

I cant wait to hear from you.... and if you want to chat or have a question, email me at talleyimages@yahoo.com - I would love to hear from you.

Tuesday, August 24, 2010

How To: Cut a Layered Cake

As a wedding photographer, Ive been to my fair share of weddings, and although most are very different, there is one thing that almost all of them have in common. By the time its all said and done, their wedding cake is butchered. Now its not really hard to see why - most people dont have the experience that is needed - there just arent that many large layered cakes that people get the opportunity to cut.

So in honor of that... I thought I would offer a tutorial on how to cut a layered cake.... this can easily apply to a wedding cake, but it also can be used for a child's birthday cake (usually of the first birthday variety).... and yall, this is going to be ghetto, but it is going to be ghetto-FAB-U-LOUS! because I am not a professional baker and this is not a professional food shoot... but hopefully it will be helpful. (oh and go ahead brace yourself for lots of pics)

First things first.... this is definitely a two person job and can get overwhelming fast... brides, please make sure you have at least 2 people at your cake tables (and make sure they read this post, so you dont have a butchered cake!).... things needed: a cake knife, a cake server, plates and forks for the guests to eat the cake, but you will also need a damp cloth of some sort (and something to put it on so it doesnt get the tablecloth wet) - this is important as cake cutting with sticky icing is messy and the more icing there is, the harder it is to cut nicely

Allright.... so here we are.... this is my lovely "wedding cake" that I made... it may not look fantastic-o, but it sure did taste good...
Here it is in all its tungsten-light glory... woo hoo!

And on to the table, where this demonstration is actually going to take place.

The first thing you want to do is to remove the top layer.... if its for a wedding, the bride and groom will save this to eat a year later... if you arent sure, save it anyway.... if its a birthday cake, this top layer makes a perfect little smash cake.... to remove, take the cake server and slide it under the top layer, use the knife - flat - on top, to move it to a plate...
.
*It is important, especially with wedding cakes, to be careful of dowel rods in the cake - be aware, and if possible, move the server over to one side and continue.
And we have lift off... :)
Go ahead and plate this top part and move on to the cake.
Looks yummy!
Ok, here is the number one mistakes most cake cutter/servers make.... they start from the bottom and try to work their way up.... NUMBER ONE RULE FOR CUTTING A LAYERED CAKE: ALWAYS, ALWAYS, ALWAYS START AT THE TOP AND WORK YOUR WAY DOWN.... its easy to see why people start at the bottom - this is usually where the bride and groom start cutting - this is only for photos.... its ok if there is a small piece missing on the bottom where the bride and groom cut - but you need to start at the top!
.
And at the top.... go about 3-4" inches vertically from the bottom of the cake (this layer is an 8" cake so the middle is about 4")... start in the middle and make a horizontal cut all the way across the layer. (note, if the layer is quite larger, then only cut about 5" or less - however big the blade on your knife is - from the side)
Then start back at where you started and cut all the way verticall down... this will leave you with probably a good quarter of the cake...
Now you can start cutting your slices.... the better way is to probably start from the outside and work your way in, but I like starting from the inside and cutting my way out - makes the most uniform pieces of cake.... each piece should be 1/2" - 1" in diameter.... this is where its important to have 2 people... as soon as you pull that first slice out, you need to have someone else there to plate it, and to also make sure that other cut part doesnt fall off the cake - this will be a big mess, and also why if youve never done this before, its probably a better idea to start from the outside and work your way in.

Look how pretty this rainbow cake is!

Its like a little piece of art!
Alright, for the rest of this side, you can cut slice by slice....


What the cake looks like so far....
It did turn out really pretty the whole way through...
For the remainder of that first layer, continue like you did before... cutting slice by slice... and dont forget to watch out for those dowel rods...
.
And now we arrive at the next layer...
This is a 10" layer, so we start like we did for the first layer.... go about 3" up from the bottom, start in the middle and cut horizontally across
Then make your cut vertically to the corner of your other cut... not 1/4 of the cake this time, but still a good chunk.
Then cut your slices about 1/2" - 1"... as I said before, I like to start in the middle, but if you are new at this, you probably want to start from the outside... again, make sure you have someone there to plate these slices and also to keep the cake from falling off
Continue slicing...


And plating...

I love how even this bottom layer turned out... just like a real rainbow...
Ok, once we have sliced our bottom row, we will move up.... this time I like to do the vertical cut first, so I can gage how far up to cut (want to stop about halfway from the top)
As before, do your horizontal cut all the way to the edge
Then slice.... again, make sure you have someone to plate and to balance the cake (its a little easier when its the bottom layer)


We plated from the outside this time.... :)
And here is what the cake actually looks like at this point.
Go ahead and finish off that row...
On to the last row.... go ahead and make your vertical cut in the middle And then slice as before.

And there you have it.... :) (click on pics to view larger)
.
A quick tip for brides: Order the cake for half as many people as you invited. So if you invited 100 people, only order cake for 50 people. Not everyone is going to show up and not everyone is going to eat cake.... this will save you money and from having a whole layer of cake at the end of the reception.
.
I cant wait to hear from you.... and if you want to chat or have a question, email me at talleyimages@yahoo.com - I would love to hear from you.